Introduction
The technological breakthrough of Image 2 is reshaping the PPT creation process. This article reveals how to transform web design inspirations from Landbook into professional-grade PPTs using visual style transfer skills. From style locking to multi-grid generation, this Codex-based workflow addresses the consistency issues of traditional methods, offering new possibilities for content creators.

I have been eager to create this for a long time. In my previous article about Coze’s skills, I developed a skill called “PPT Style Cloning.” At that time, I had a rough idea of extracting visual details from reference images or web pages to transfer styles into my PPT generation process.
Although I managed to implement it in Coze, the operation was somewhat challenging. One had to be familiar with which reference images suited which styles; otherwise, the transfer effects would be subpar. Initially, only five people rated the skill, and all gave it a score of 1 (the lowest).
Being somewhat of a perfectionist, I couldn’t accept the lack of uniformity in many details. While they looked good individually, their visual consistency in a single PPT was inadequate.
For example, in the two images below, although they are part of a generated set, the black frames differ—one is a square frame while the other has rounded corners. Additionally, the decorative elements of small titles in various scenarios showed significant discrepancies.
Solution
Is there a solution? Previously, it was challenging, but now I believe it is possible. The main factor is that Codex’s support for Image 2 has greatly enhanced my exploratory spirit. I discovered an excellent skill for creating PPTs that effectively transfers the styles of reference images to achieve the desired PPT effects.
Almost any style can be transferred by Image 2.
Let’s take a look at the output effects. The reference images for this style came from the website Landbook (https://land-book.com/). Although it primarily serves as a library for web design inspiration, its visual highlights are universally applicable, and the layout effects of the shared web images are worth learning from.
Here are the reference images:

Output Process
When outputting PPT images, my logic is to first generate a multi-grid layout to establish the basic format, which is then enlarged one by one. One impressive aspect of GPT Image 2 is that while adhering to the layout, it can further optimize poorly handled areas when enlarged, which I find better than what Nano Banana Pro offers. However, for portraits and character-related images, Nano Banana Pro performs better, as seen in the last case.
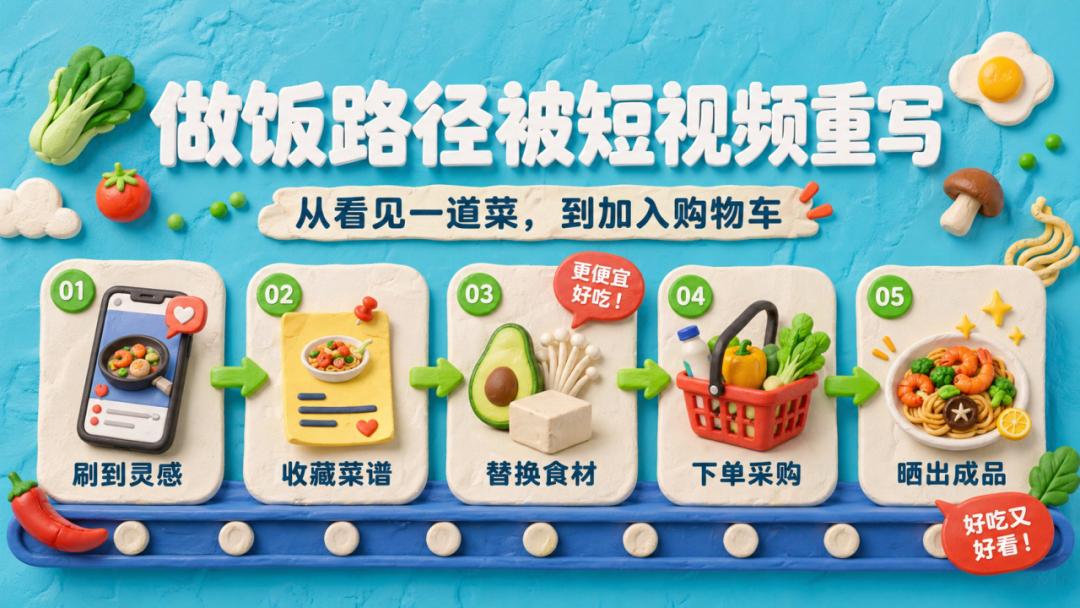
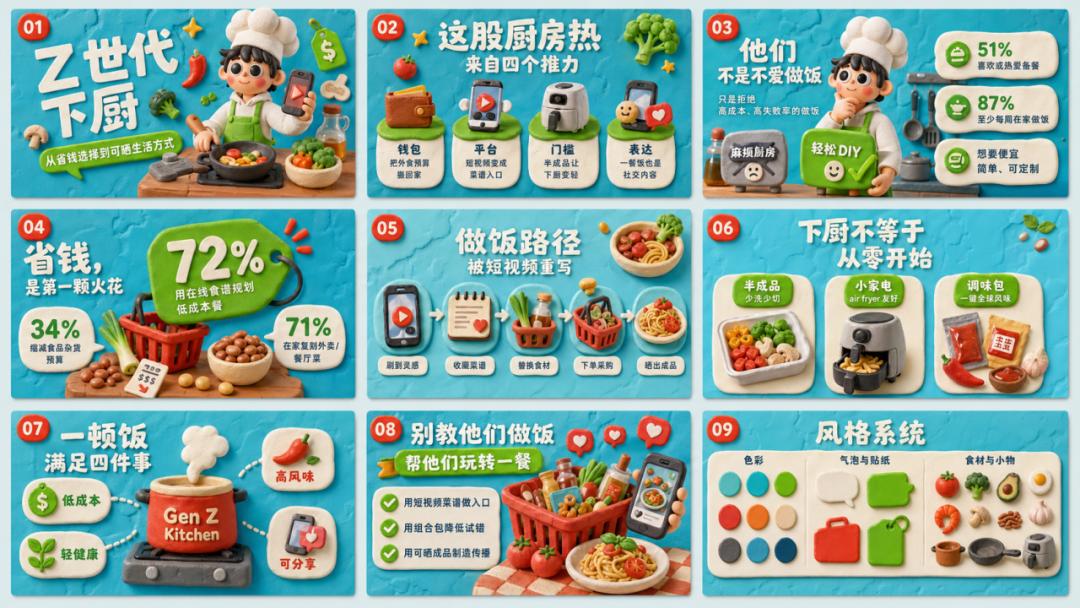
First, let’s look at the multi-grid:

Now, let’s see the complete output:

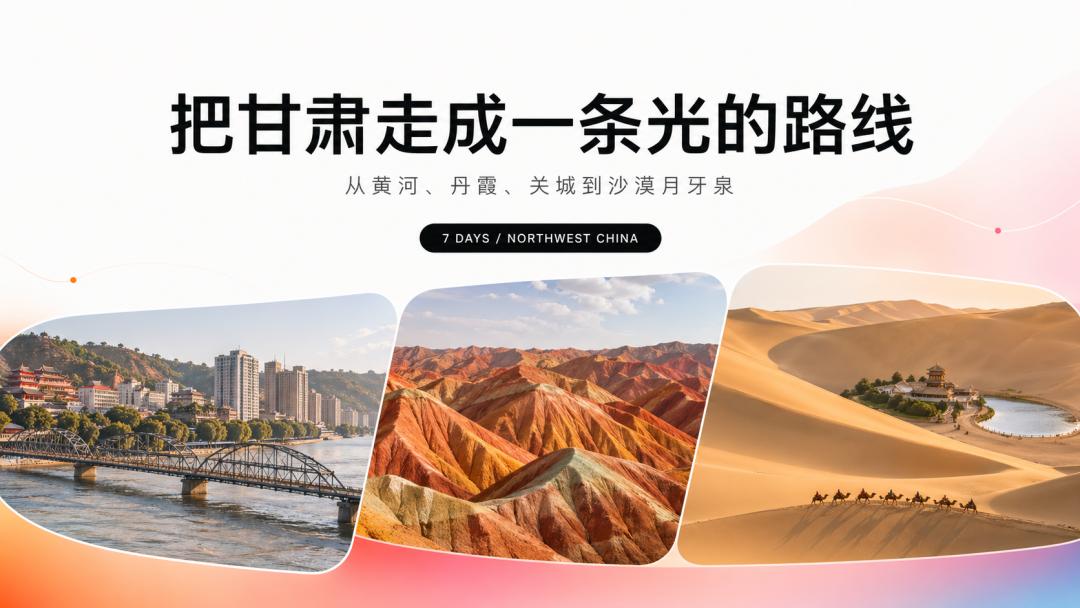
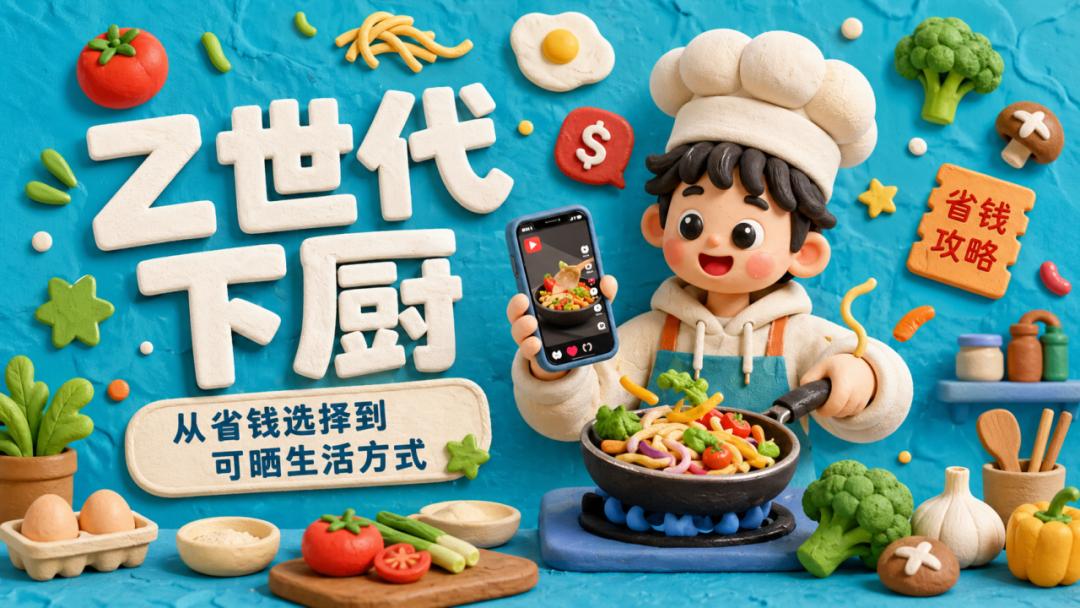
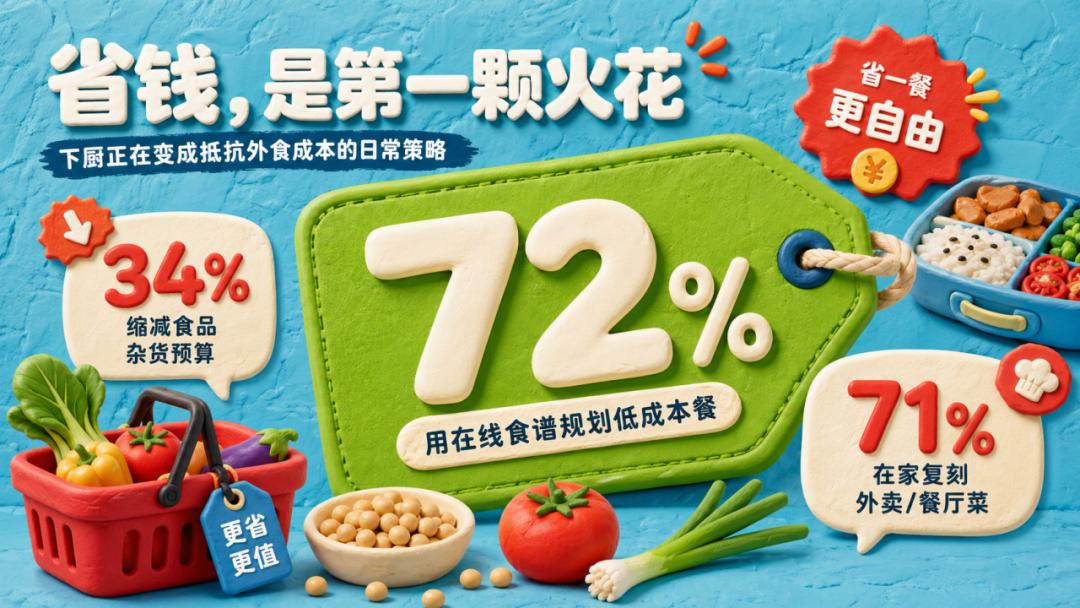
Here are the reference images:

This is the output PPT based on the reference images, which requires minimal modification. By the way, how did you know I plan to travel to Gansu during the May Day holiday?
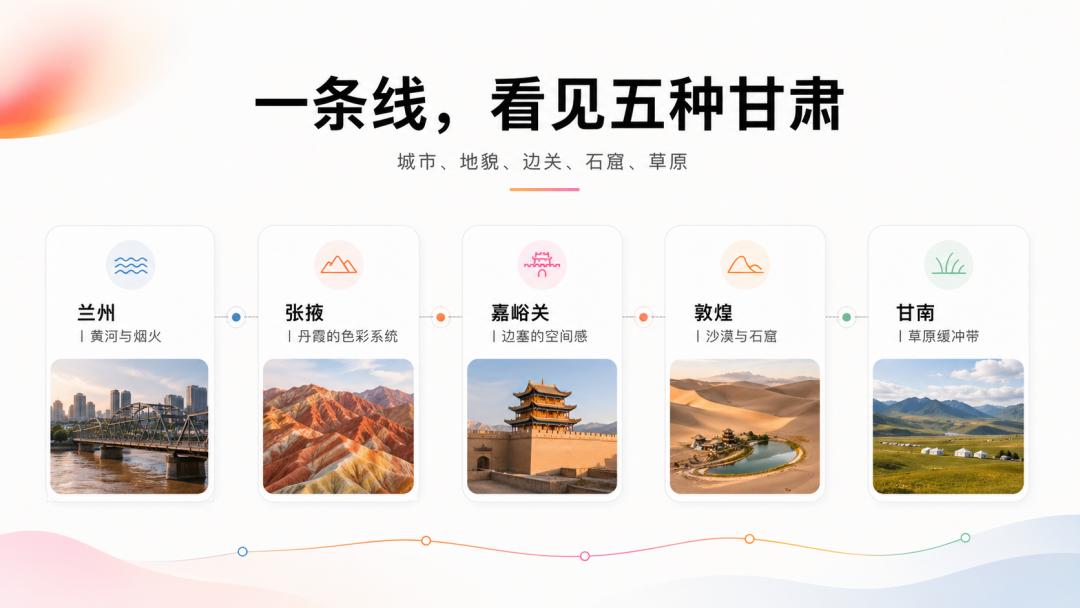
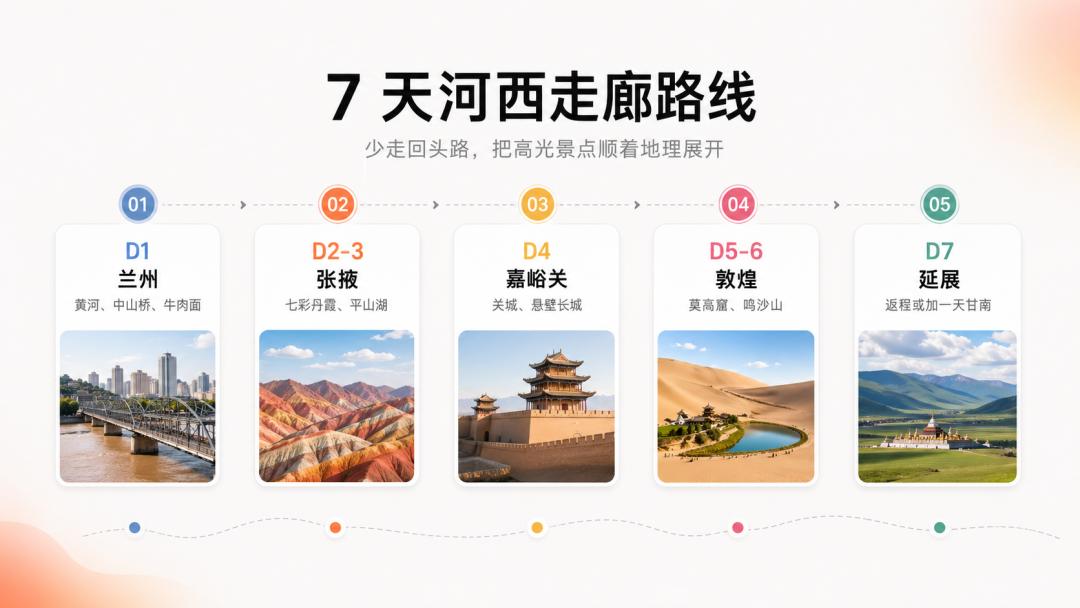
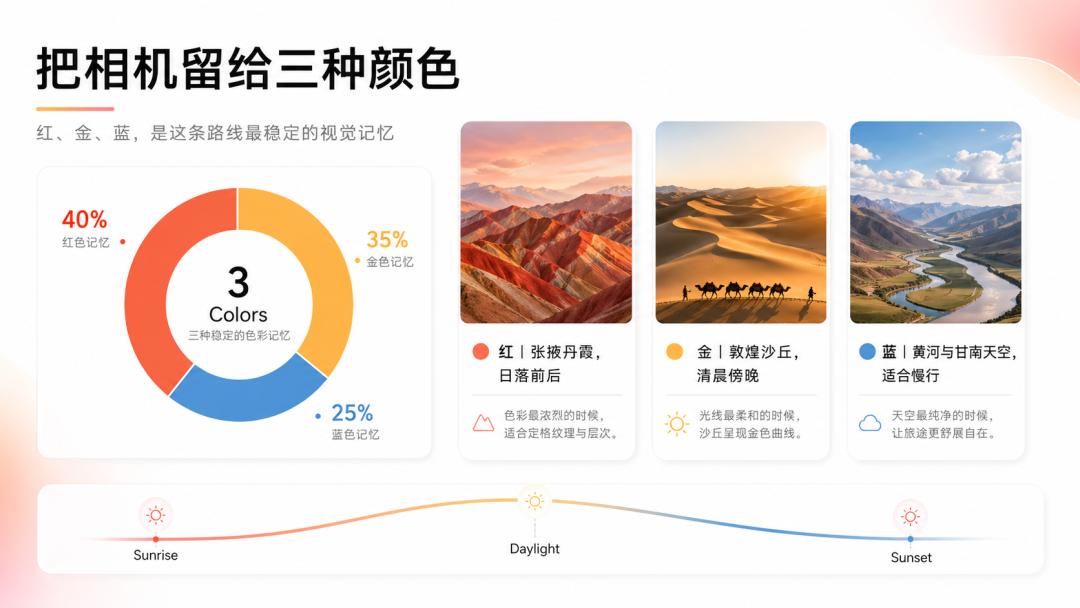
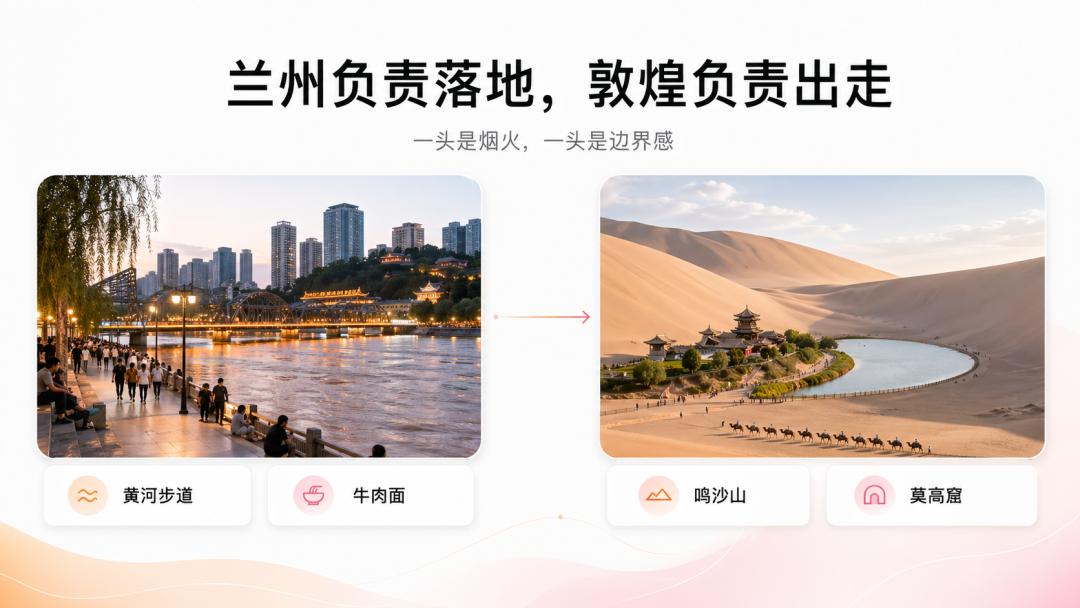
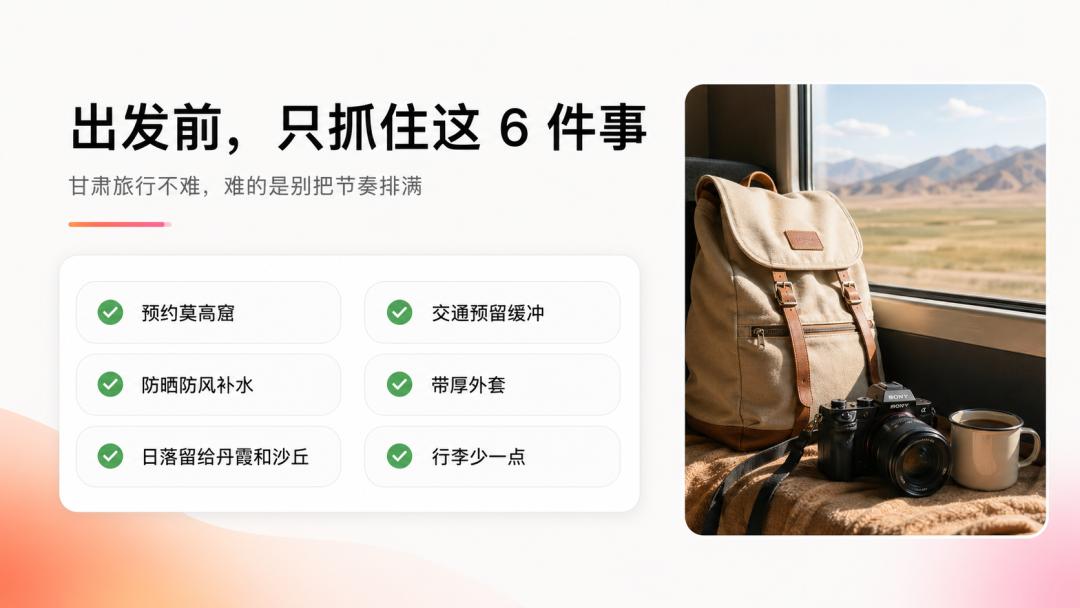
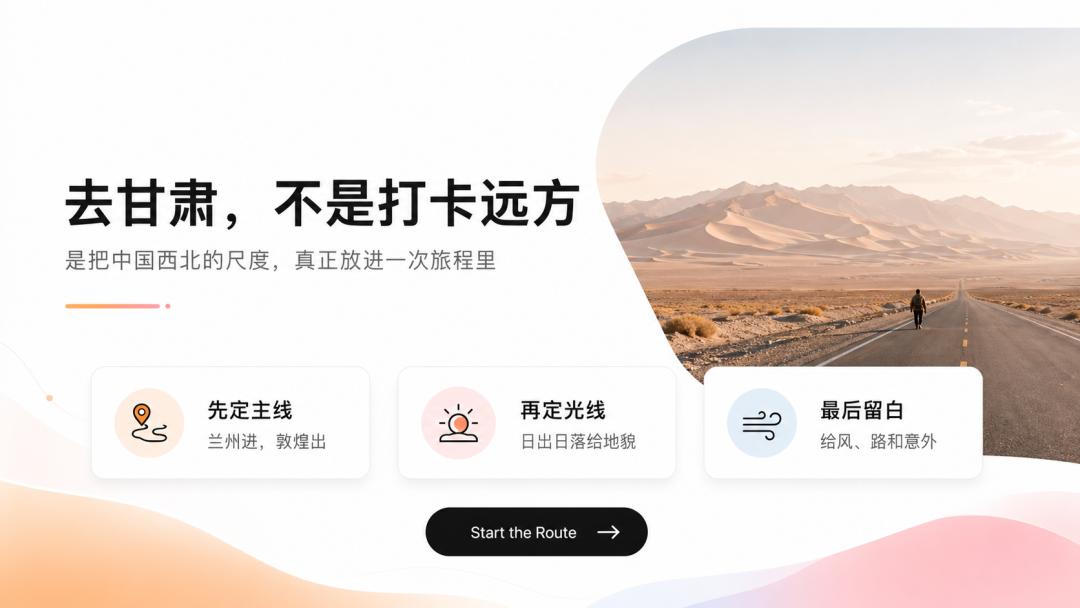

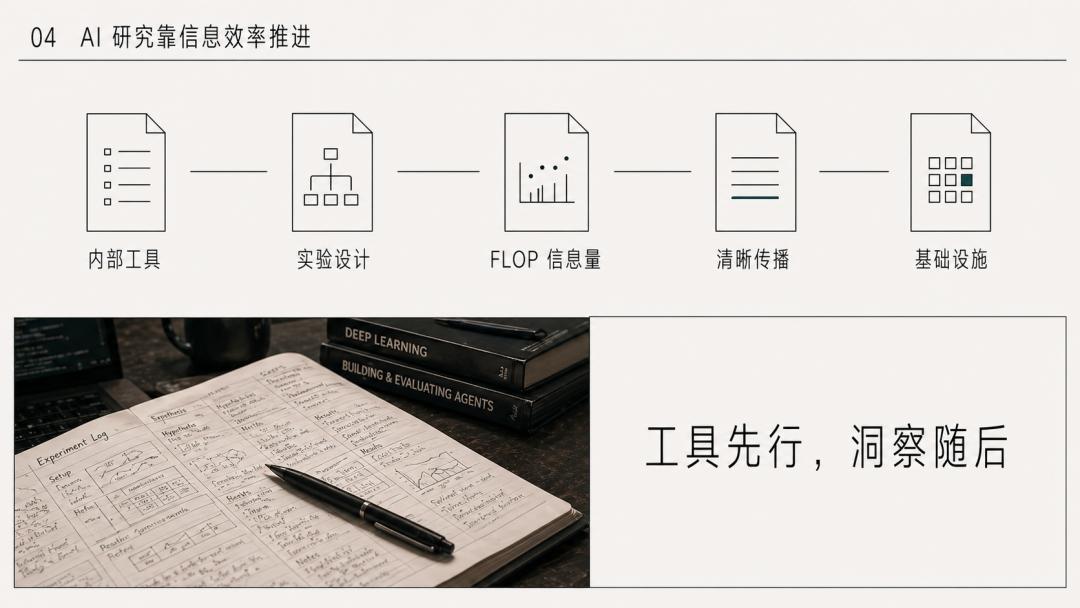
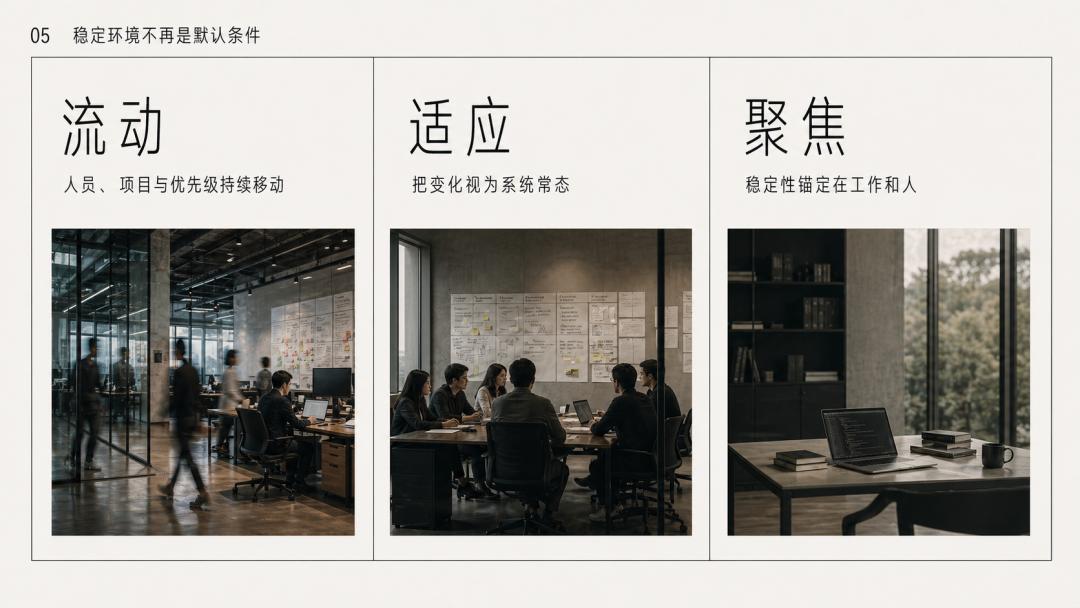
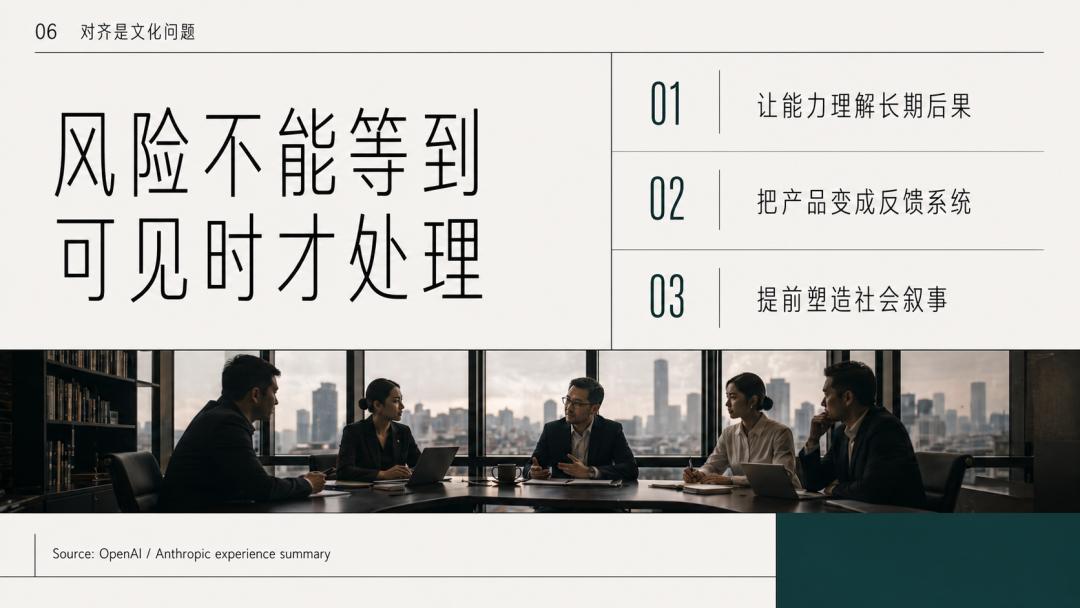
This also applies to the previous groups, with earlier ones being simpler and later ones more complex.
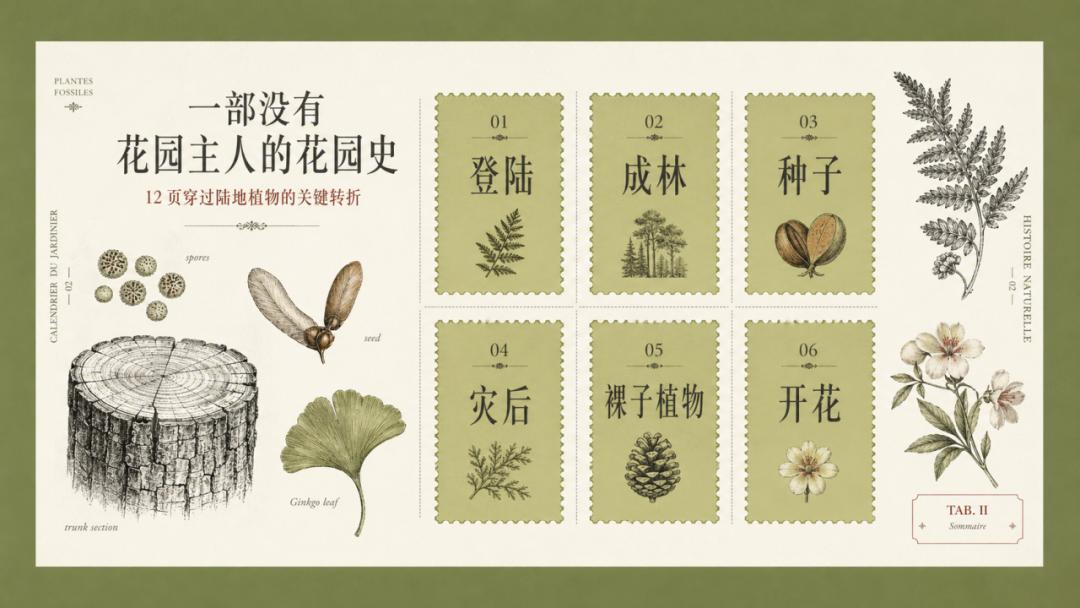
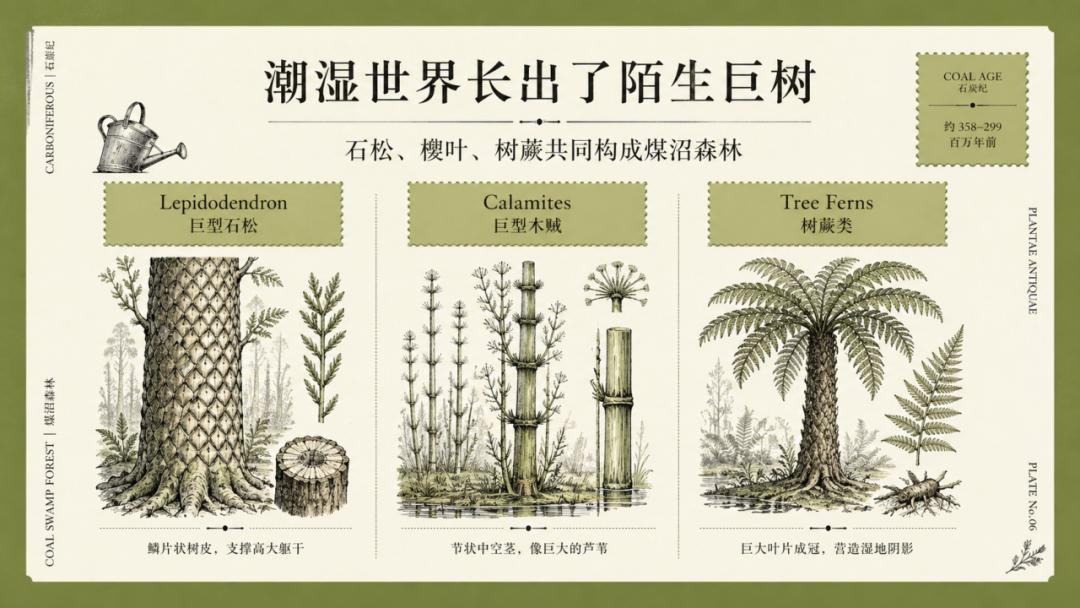
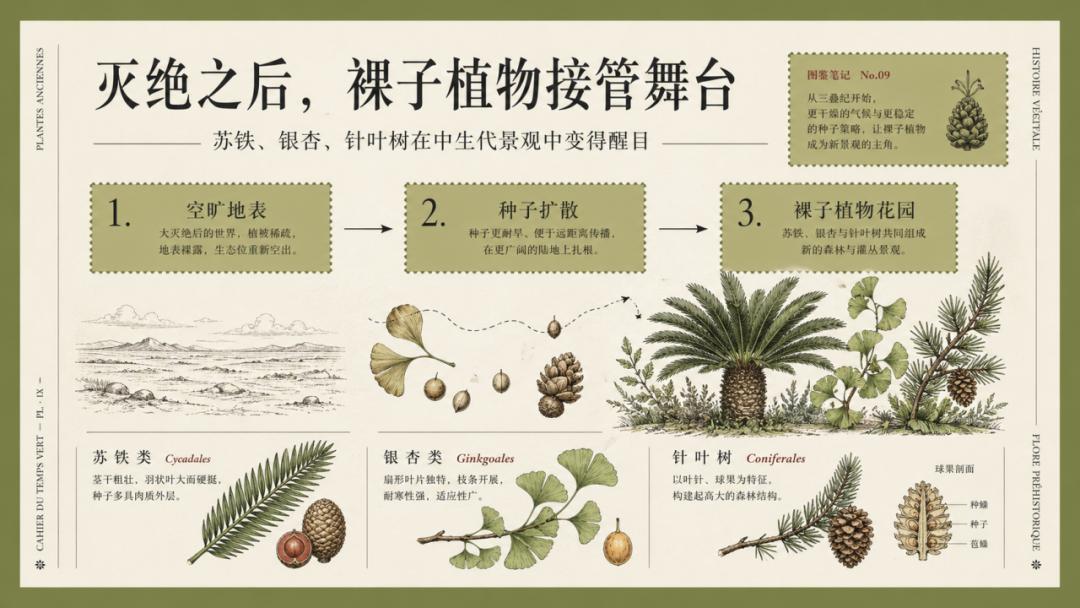
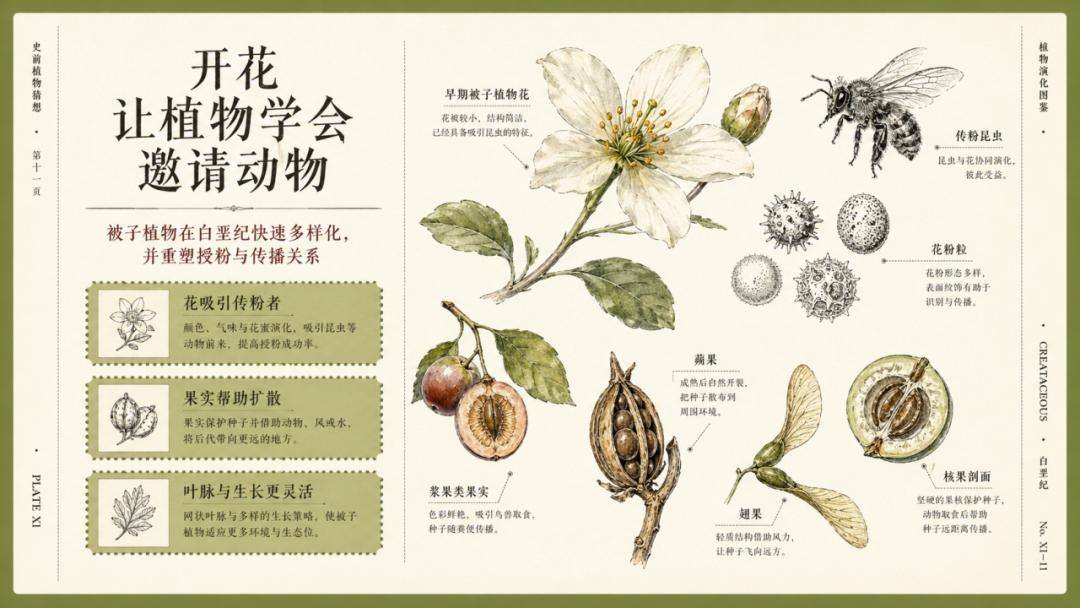
And this one:
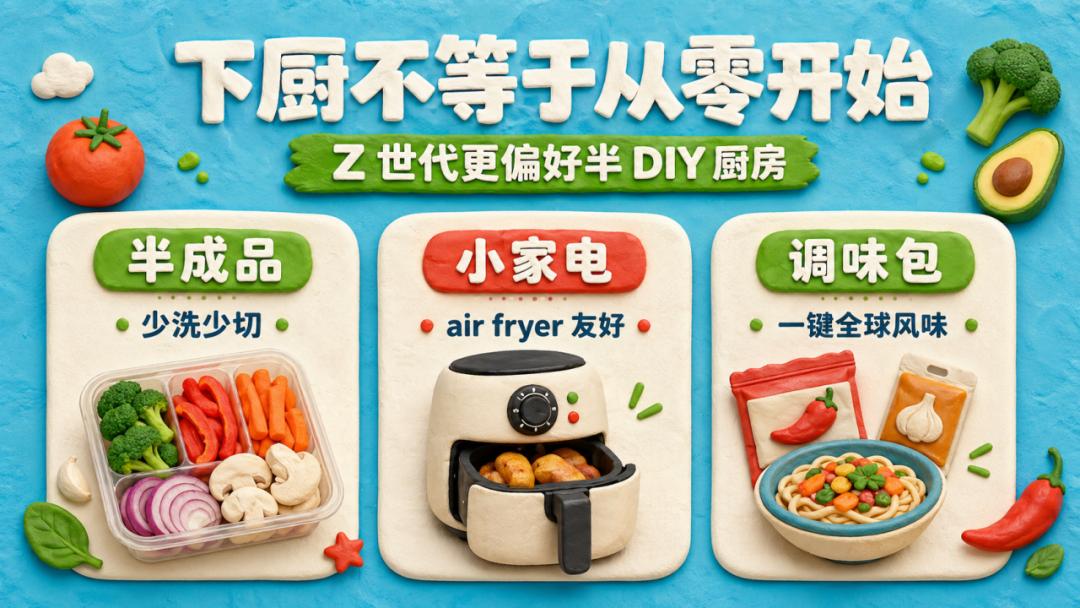
While it may not be perfect, the overall tone and details are quite satisfactory.
Workflow Sharing
Now, I will share the working process of this skill and my thought process.
This skill does not focus on creating editable PPTs; instead, it follows the route of “first assetizing visual styles, then using Image 2 to generate complete images, and finally packaging them into image-based PPTX.” This primarily relies on the powerful capabilities of Image 2.
Here is my thought process (this style is the default style of this skill):
- Determine Task Type: GPT first identifies whether it’s about extracting styles, calling a style library, converting documents to PPT/images, revising existing image-based PPTs, or redesigning single-page visuals.
- Select or Extract Style: Clearly use one Style source (for reference style resources) and one Style Lock (to lock visual details) to prevent mixing in historical reference images or other styles.
- Understand Content: Extract a main statement, audience, 3-6 core points, visualizable objects, and suggested page numbers from the document or theme. This step prepares for the content of the PPT.
- Confirm Production Parameters: Page count, ratio, output type, language, text density, and whether to include date/author/logo/watermark. The defaults are Chinese priority, 16:9, low density, and no date. This is where visual details are locked.
- Plan Page Types: Assign roles for each page from cover, table of contents, core points, comparisons, processes, frameworks, timelines, data, cases, lists, to conclusions. This also locks visual details.
- Generate Document First: For multi-page projects, an outline.md (content framework) and prompts.md (complete prompt) must be generated first. The prompts.md must include a complete Style Lock (to unify the visual details of multiple images).
- Two-Stage Generation: For multi-page projects, generate a thumbnail board to lock the overall rhythm before generating individual finished images page by page. Here, I chose to first create a multi-grid image to better maintain the consistency of different page layouts.
- User Confirmation of Images: After generation, display or list the images for confirmation before assembling the PPTX and zip.
- Partial Revisions: Redo the specified pages while retaining others and the same style system.
- Final Packaging Quality Check: Check for style consistency, readability in Chinese, non-congested information, matching page types, no black borders, no fake dates, one image per page, and full-screen layout in PPTX.
How to Use
The recommended tool is Codex. It is intelligent enough to understand and output the text content I need and can batch produce high-quality images with text. If Codex is unavailable, you can also try Lovart, LibTV, or Kouzi.
First, install this skill or directly copy my final link to Codex for installation. By the way, the blurred part is because it is an unrelated skill, not intentionally hidden. Once adjusted, I will share it in the next issue; it is also a very interesting little tool.
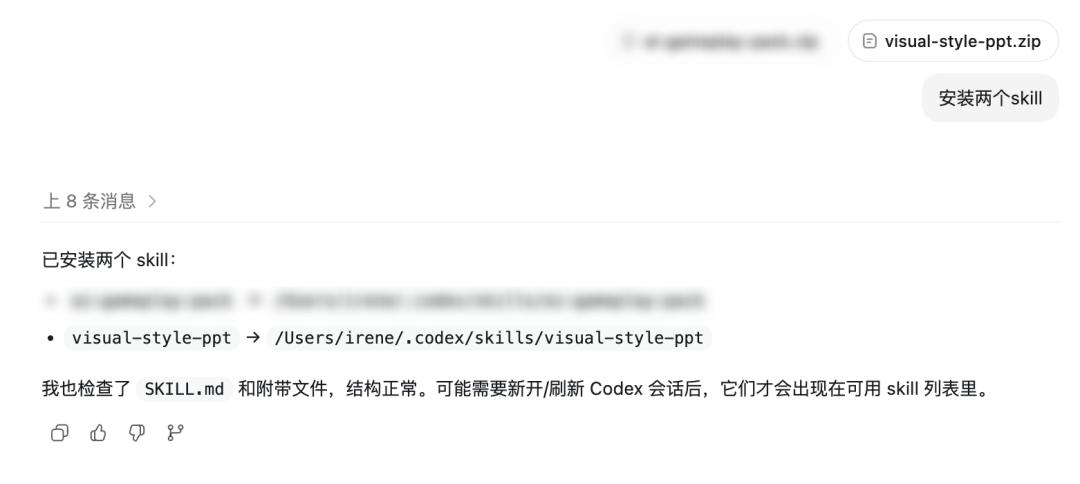
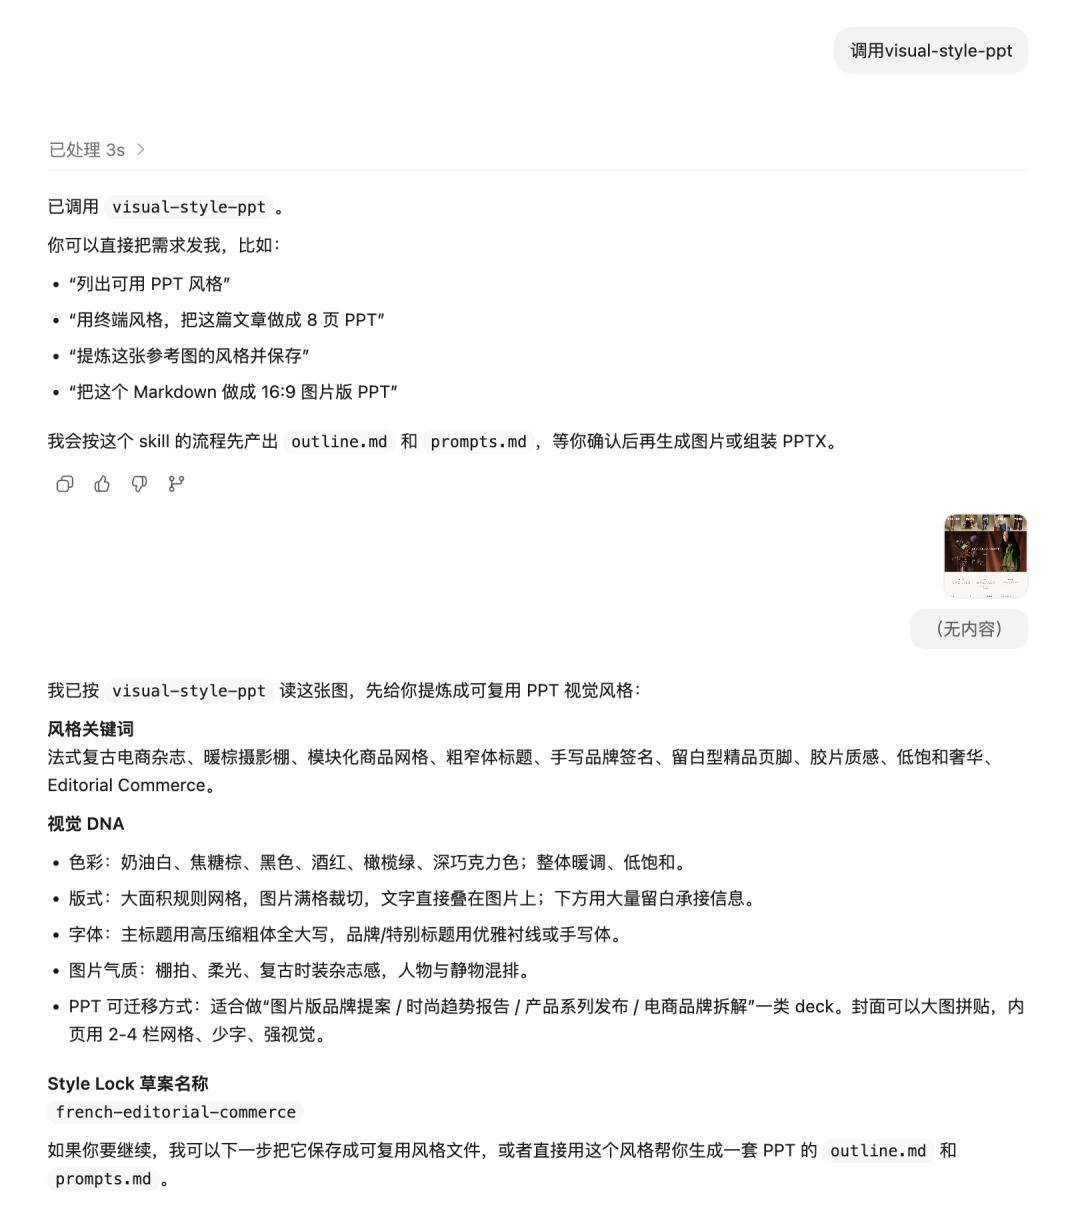
After installation, let it call this image recognition skill for PPT or directly let it call the visual-style-ppt skill. Provide it with the reference image or webpage link and instruct it to extract the style DNA from that image, and it will complete the extraction.
Next Steps
Once the style is extracted, provide the designated document path or attachment for it to generate the PPT. If there is no document, you can also let Codex find the information.
However, at this step, it will not generate the PPT immediately. It will first generate the initial files for our confirmation, producing an outline file and a prompts file.
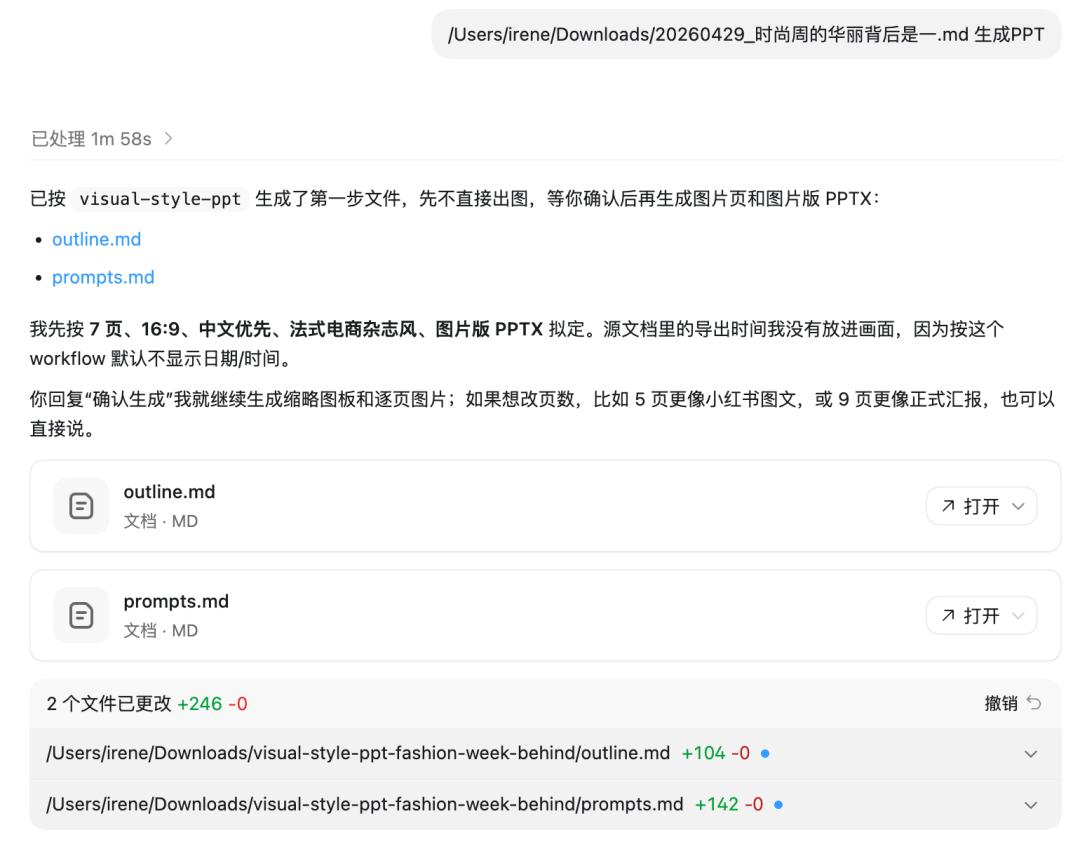
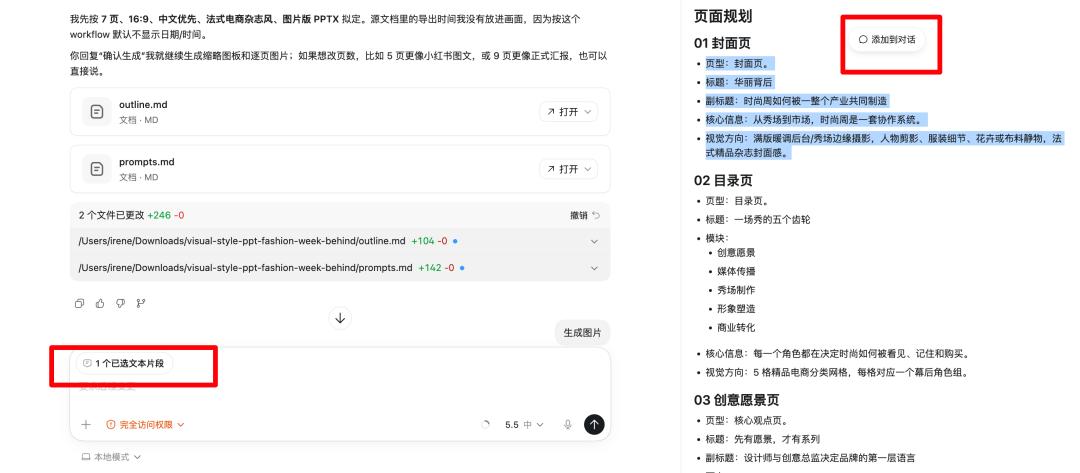
The outline document is essentially the text outline of the PPT. To maintain better control over the content, my idea is to output this document separately for confirmation. If there are any issues with the content outline, you can select the content and “add to conversation” for modifications. This will be illustrated with screenshots later.
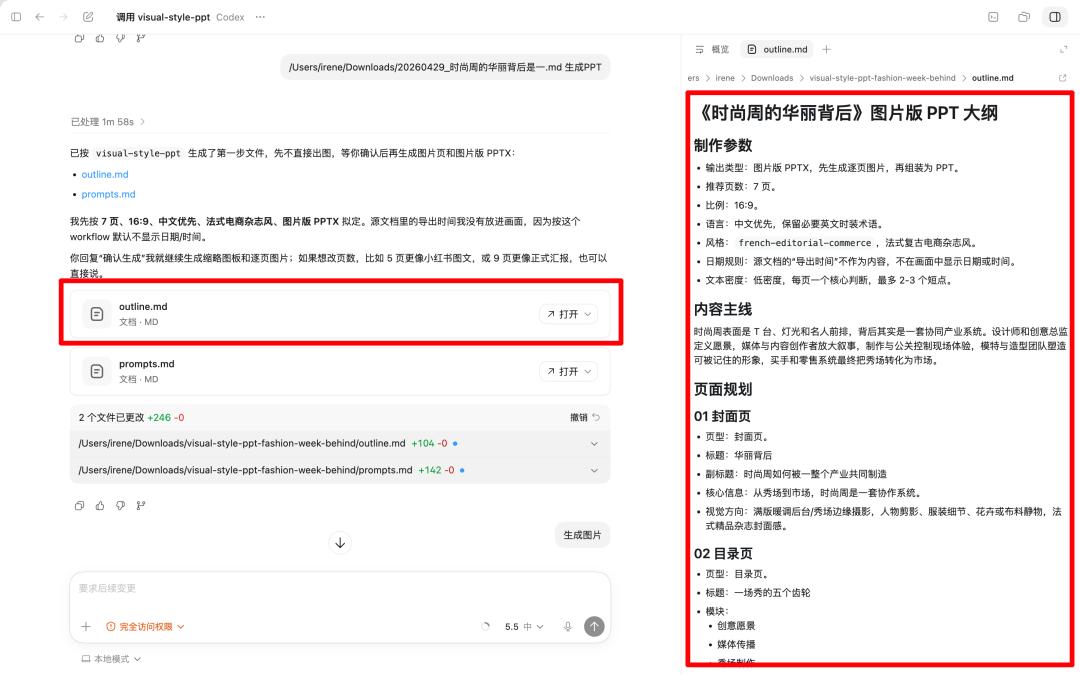
Next is the prompts, which I believe everyone is familiar with. This document contains the prompts, but I have added detailed production parameter standards and a unified Style Lock, which locks the style and hierarchical details firmly.

After that, you will see thumbnails and detailed prompts for each PPT slide. The reason for this approach is to make both style and content more controllable during the content phase.
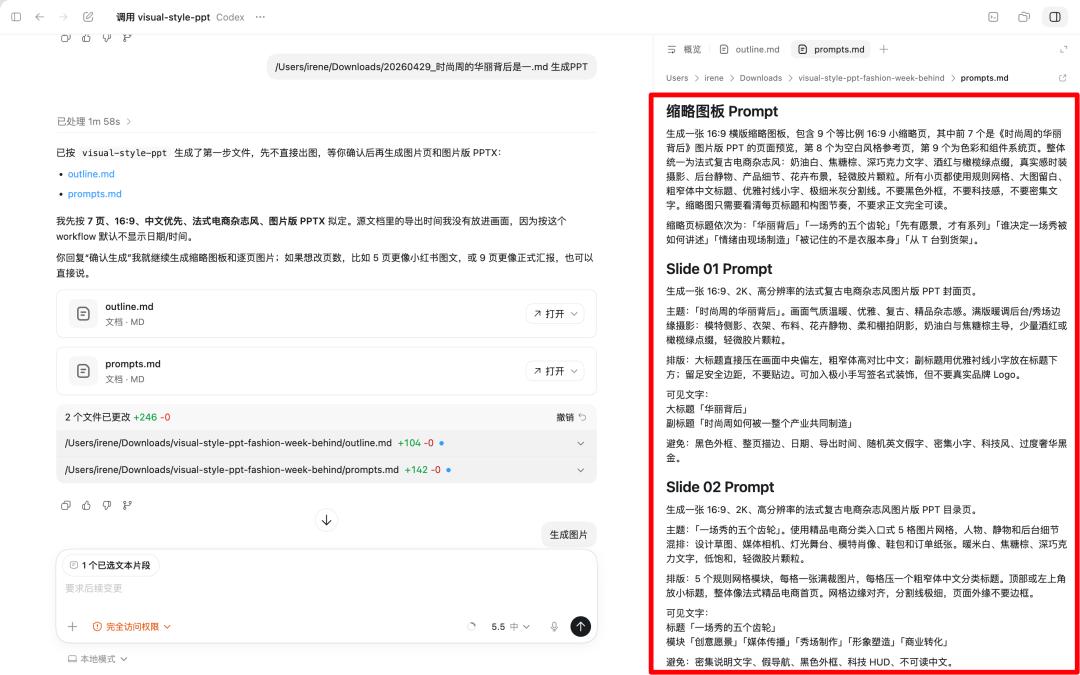
Once the details in the two documents are confirmed, you can instruct it to generate images by saying “generate images” or “continue.” The image generation occurs in two steps: first producing the multi-grid; if unsatisfactory, modifications can be made until satisfied, then generating images one by one. In my case, the content is brief, so there are only seven images. For longer PPT content, consider letting it complete in multiple rounds.
The original document comes from:
https://substack.com/home/post/p-186699129
Of course, if you find all these steps tedious and cumbersome, you can directly instruct it to output the PPT images. This approach primarily aims for detail control.
The final large images and the thumbnails may still have some differences, but in my attempts, they usually improve in quality, so they are generally acceptable.

After the first round of all images is output, adjustments can still be made. For instance, if the original image sequence number is incorrect, I can request further modifications.
However, the persistent issue remains with Image 2 regarding portrait details.
If there are other textual details to modify, you can take a screenshot and highlight it for adjustments.
Once the images are confirmed, you can directly instruct it to export the PPT or simply say “package.” It will deliver all confirmed images, thumbnails, outlines, and prompt files in the final confirmation package. Do not misunderstand; the PPT here is still a combination of images that cannot be edited. Any necessary modifications must be completed in the previous steps before packaging the compressed file.
The final output compressed package contains:
Among them, the Style-used file is a reusable style template. It serves as a style setting file for subsequent generations, revisions, and reuse. Its function is as follows (you see, when I generated an infographic again, I called the same style template, and its style maintained very well). This means that if we want to add PPT pages, we can directly supplement content based on this foundation, not limited to just nine pages.
How to Use - Text Version
Finally, let me summarize how to use it:
- Install this skill in Codex.
- Provide it with reference images to extract style DNA.
- Give it our document for generating PPT images based on the document. This step will generate two documents; after confirming modifications, proceed to the next step.
- Check and modify image details; if there are no issues, instruct it to package the files.
- The Style-used file can be reused next time; if you find it useful, you can let it save directly to the skill.
Conclusion
That’s it! I’ve shared my entire thought process and operational methods. In the future, if you want to transfer the styles you are accustomed to into PPTs or experiment with new PPT styles, it will be very convenient.
Lastly, this skill has been shared on GitHub; here is the link. If you like it, please give a star to my GitHub:
https://github.com/irenerachel/visual-style-ppt-skill
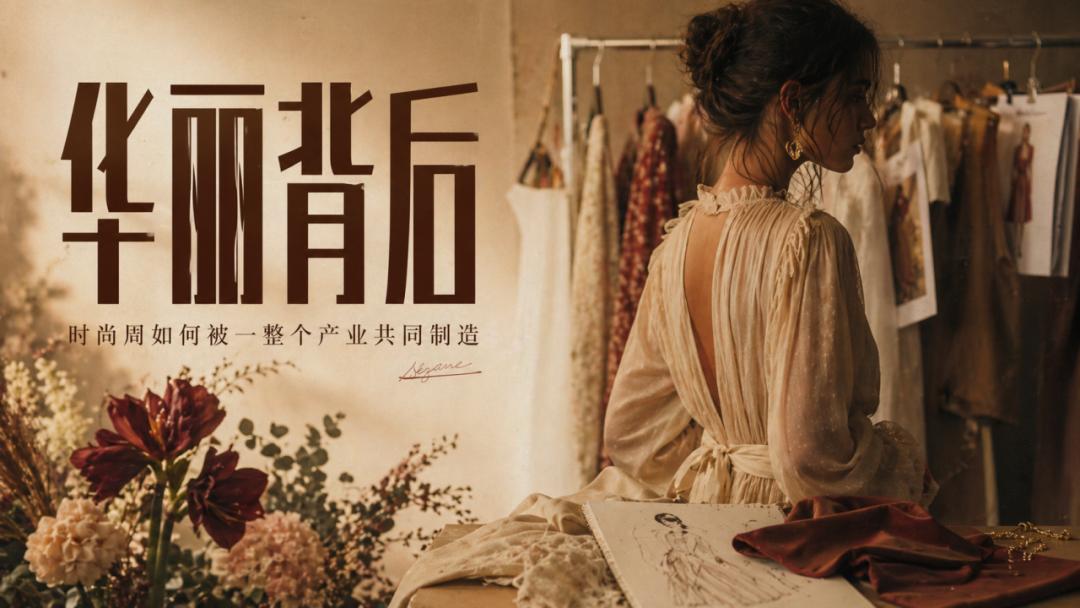
The cover image is from Unsplash, based on the CC0 protocol.
Comments
Discussion is powered by Giscus (GitHub Discussions). Add
repo,repoID,category, andcategoryIDunder[params.comments.giscus]inhugo.tomlusing the values from the Giscus setup tool.